> For the complete documentation index, see [llms.txt](https://docs.appetize.io/llms.txt). Markdown versions of documentation pages are available by appending `.md` to page URLs; this page is available as [Markdown](https://docs.appetize.io/account/single-sign-on/azure-active-directory.md).

# Azure Active Directory

## Prerequisites

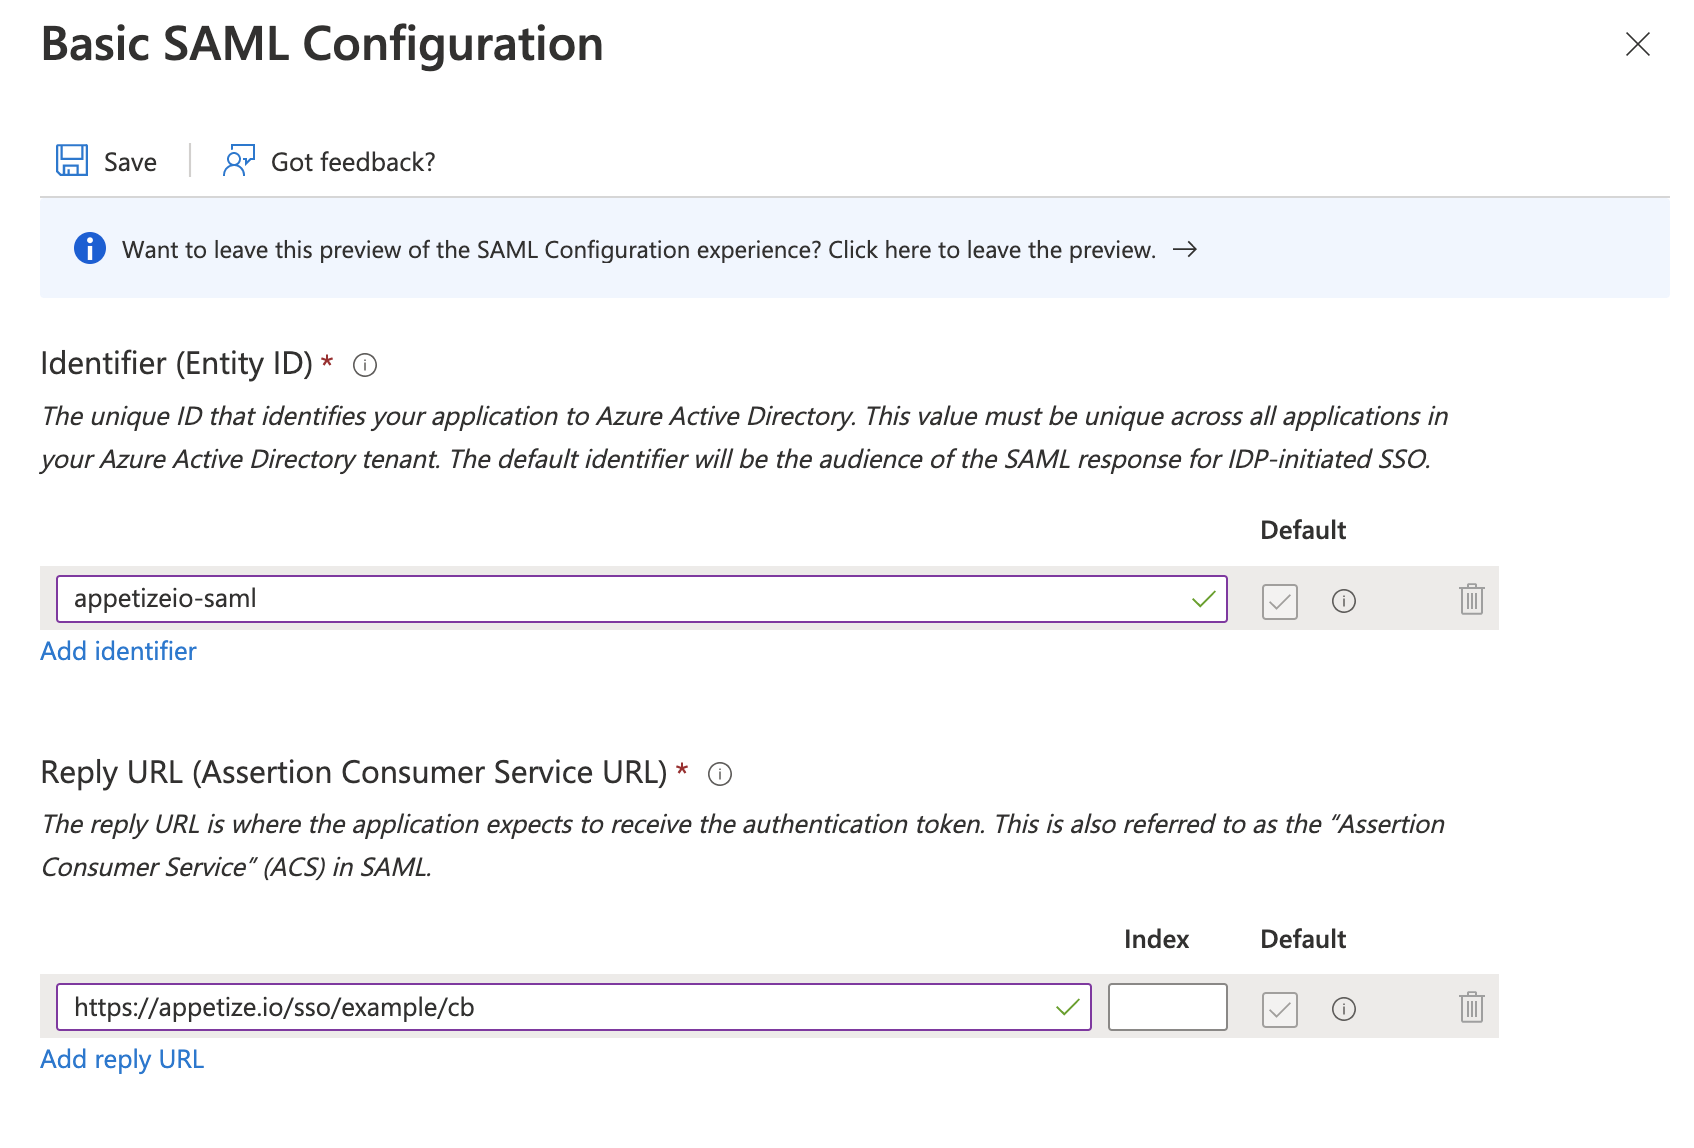
Please have the **entity ID** (usually `appetizeio-saml`) and the **Assertion Consumer Service URL** (looks like `https://appetize.io/sso/example/cb`) you received from Appetize support.

## Azure Active Directory Setup

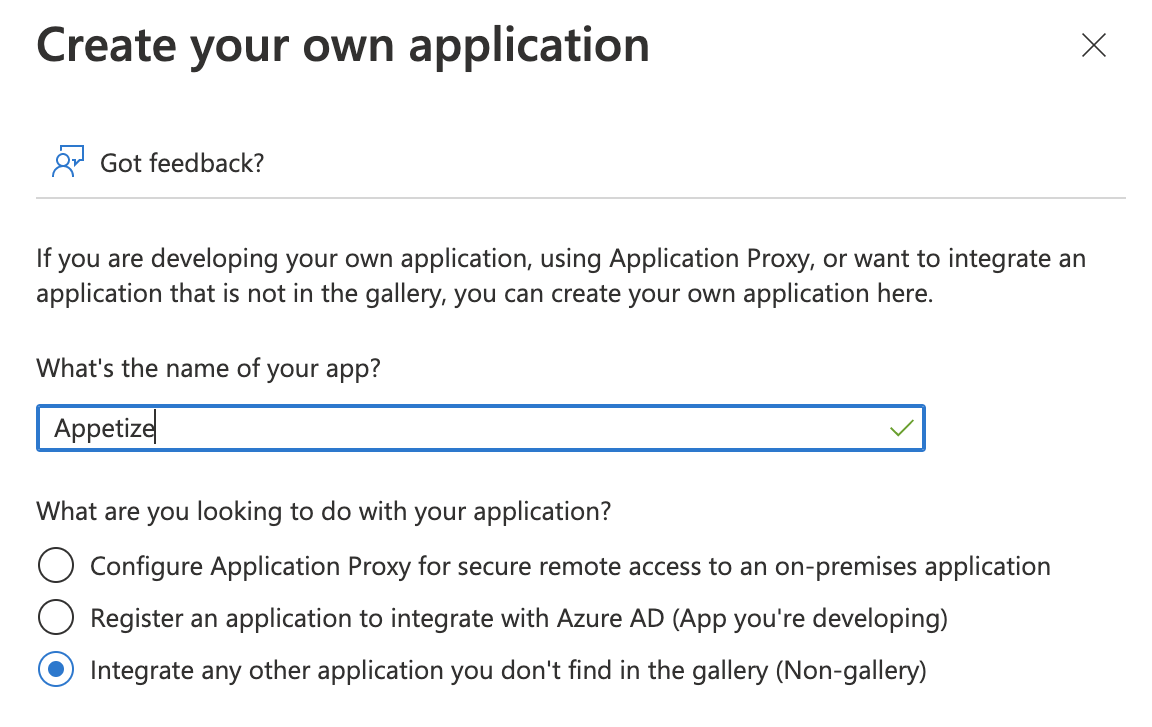
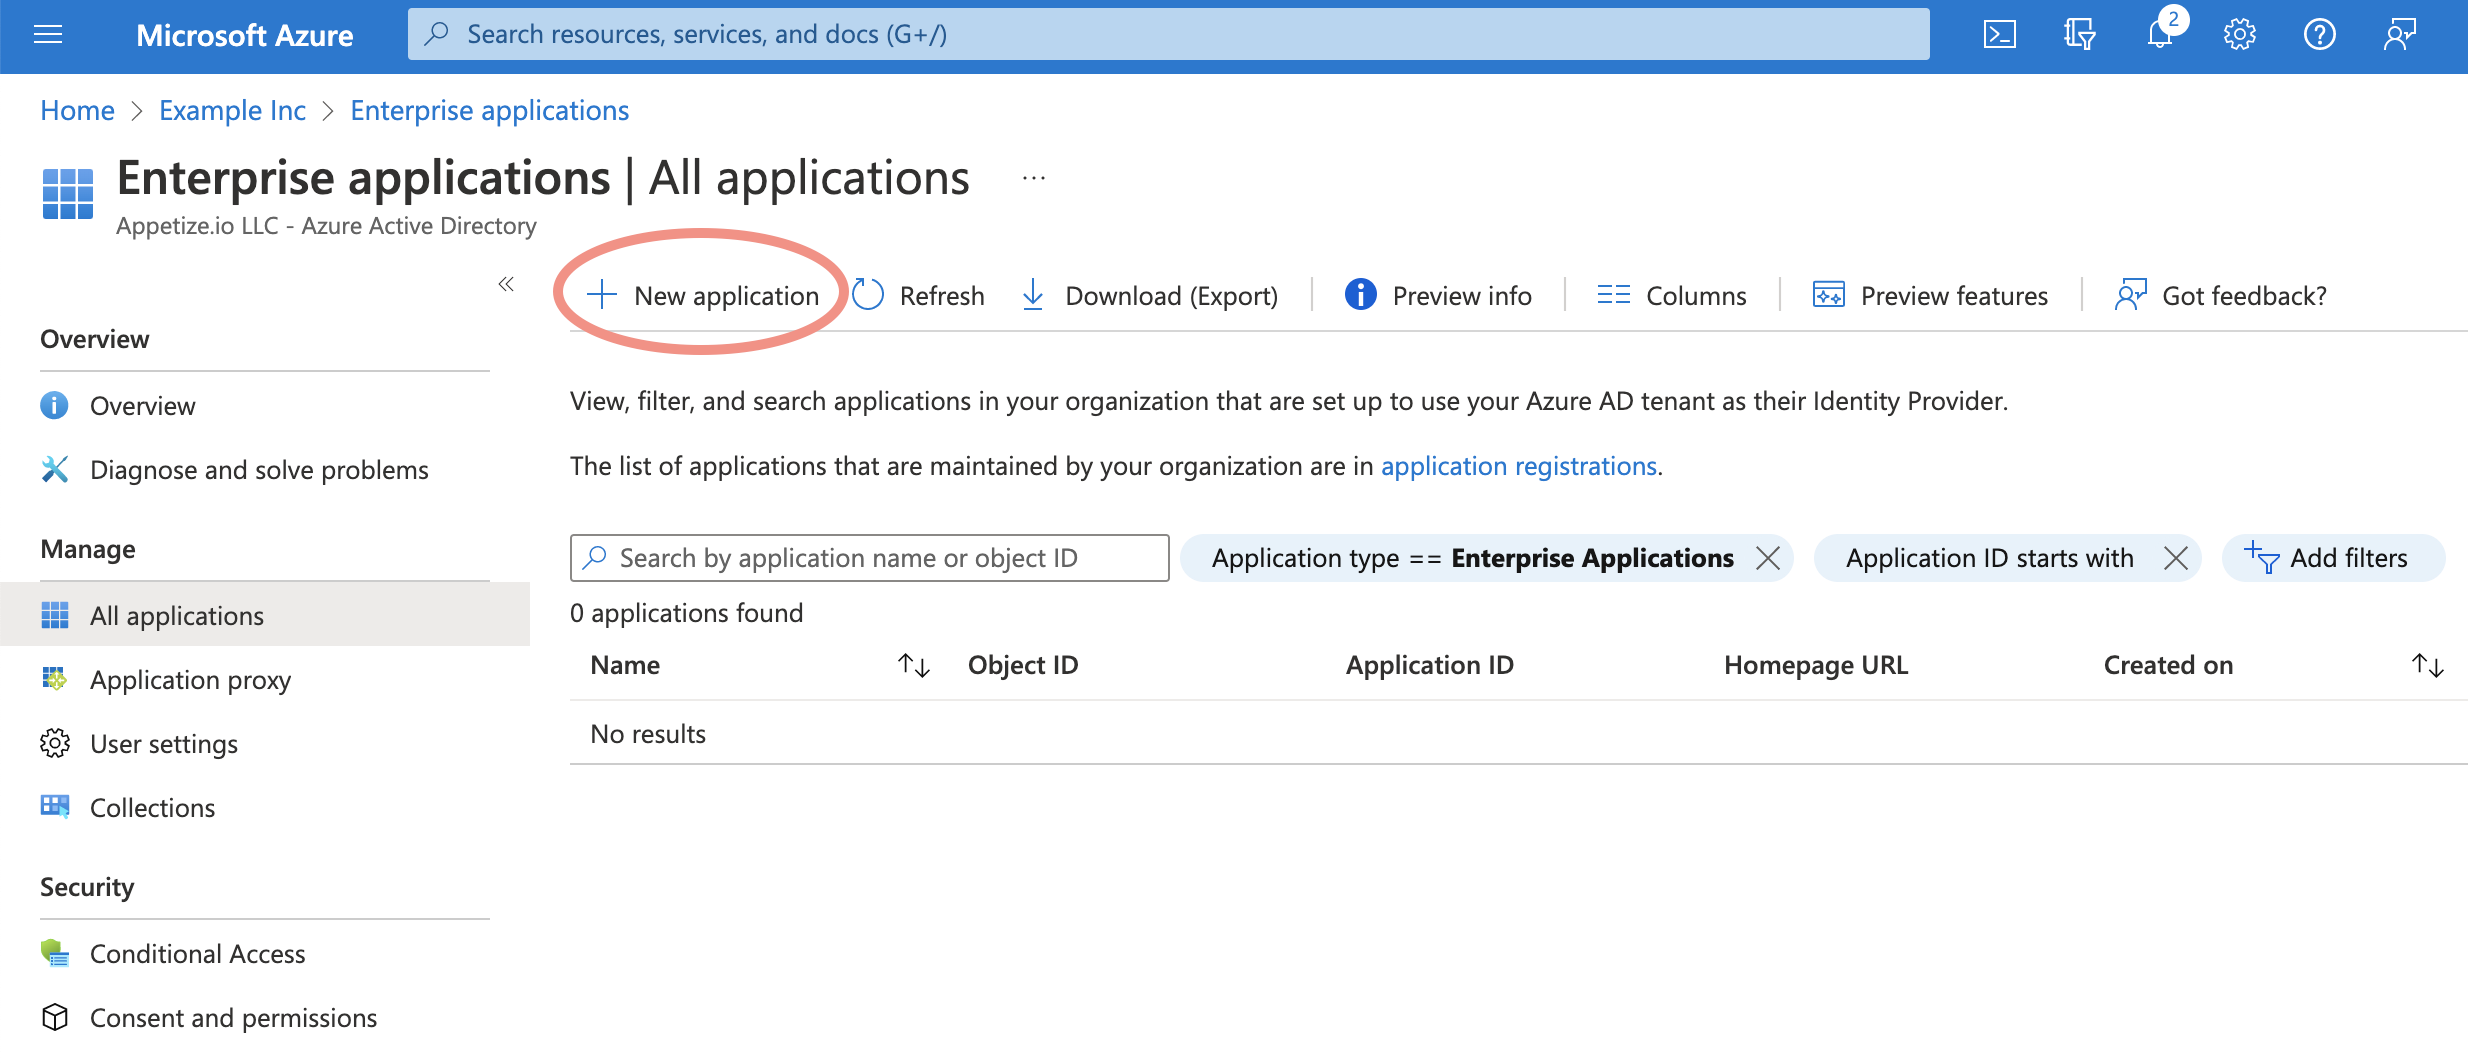
In Azure Active Directory, go to Enterprise Applications. Create a new application. Choose a name for it (e.g. Appetize) and select "Integrate any other application you don't find in the gallery (Non-gallery).

<figure><img src="/files/JJlbW9h7tVV9hwf7U7GH" alt="List of enterprise apps. Click &#x22;New Application&#x22;"><figcaption><p>List of enterprise apps. Click "New Application"</p></figcaption></figure>

<figure><img src="/files/R198dfETqS2JD03WXFfx" alt=""><figcaption><p>Choose a name, e.g. "Appetize" and choose Non-gallery</p></figcaption></figure>

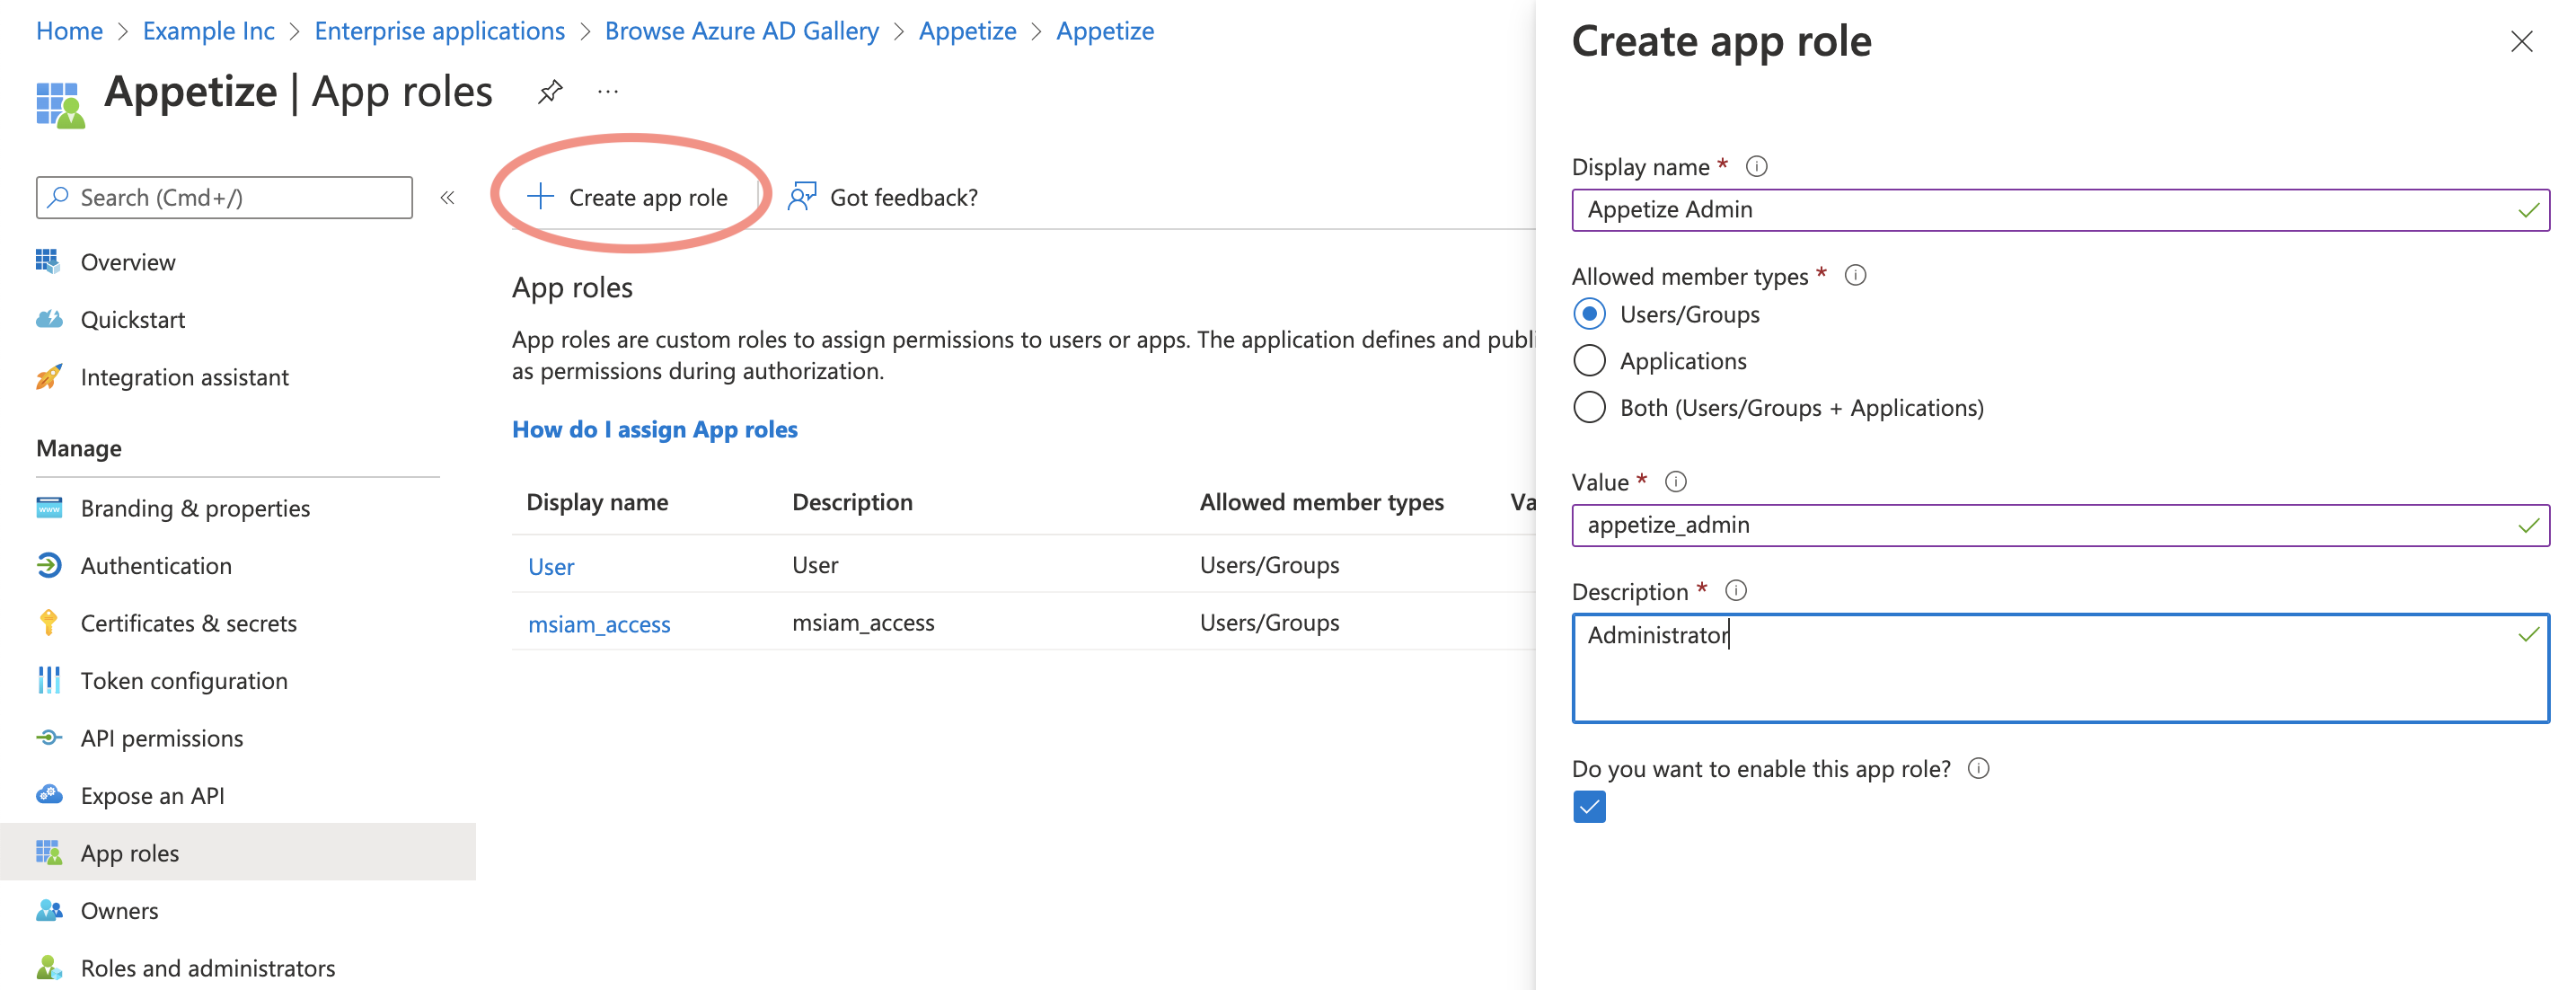
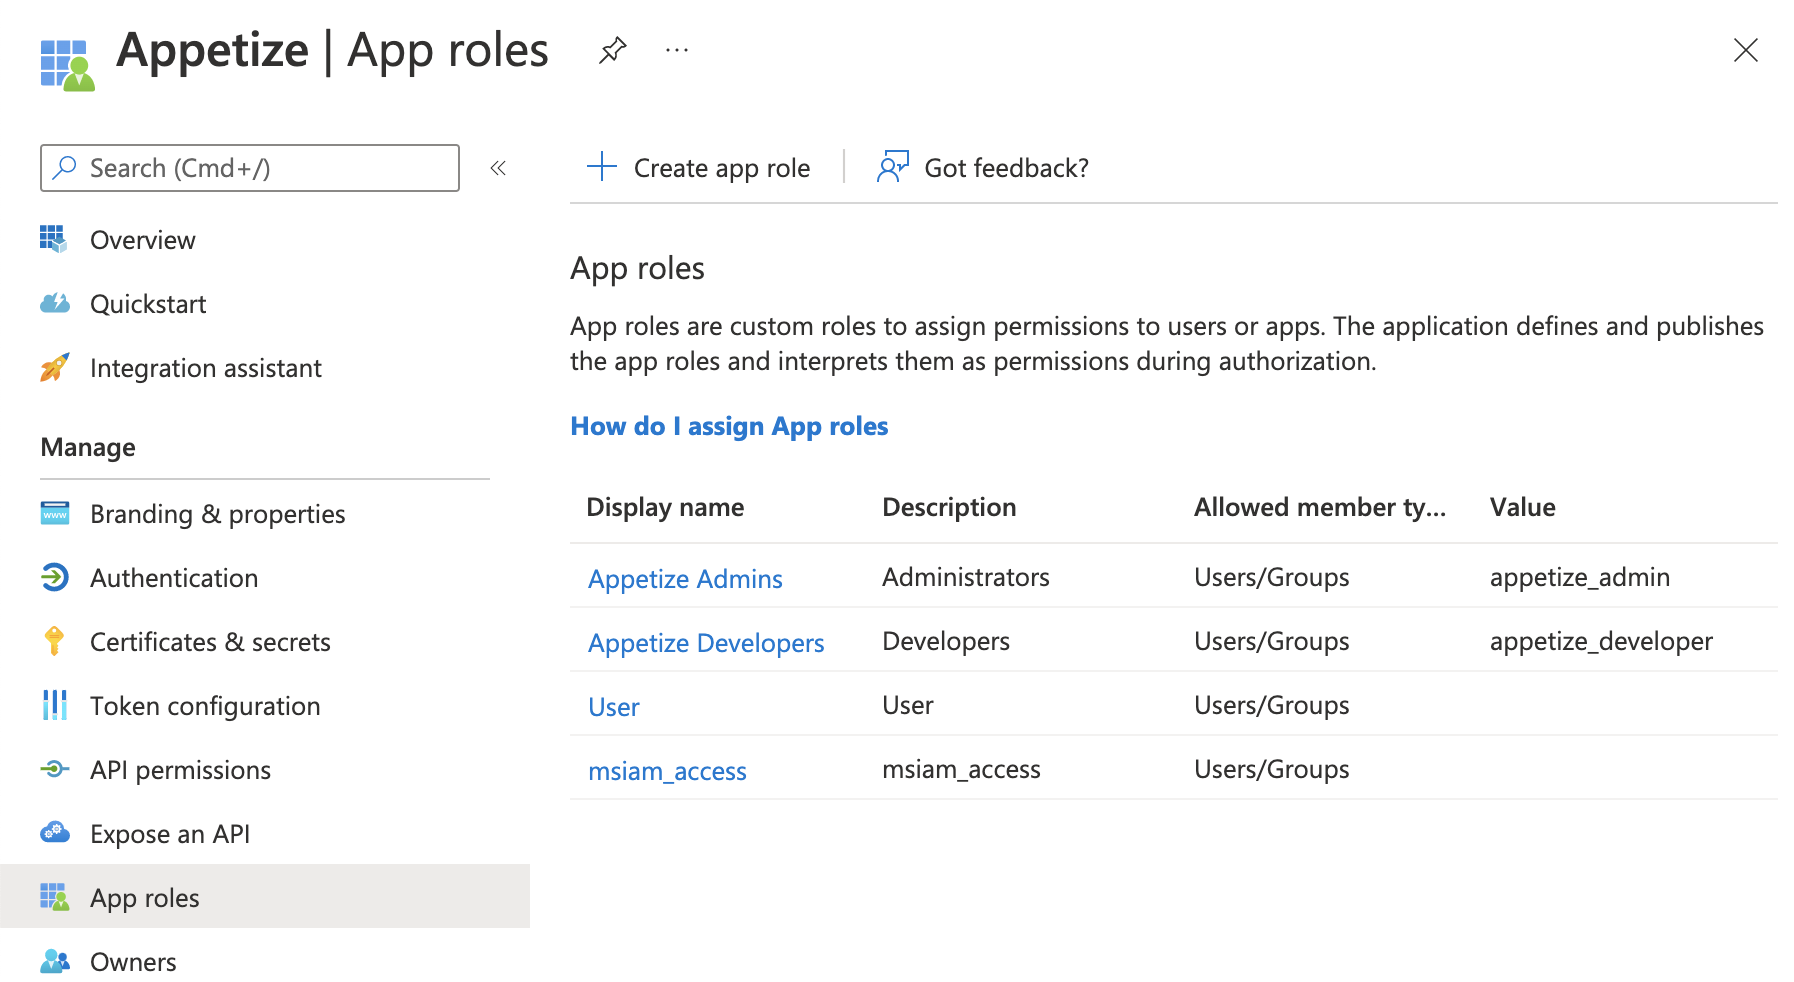
With the App created, click on "App roles". Create a role named "Appetize Admin" with value `appetize_admin`, and another role named "Appetize Developer" with value `appetize_developer`.

<figure><img src="/files/s7rqTh4CHqYOLENHkHHx" alt=""><figcaption><p>Creating the appetize<em>admin app role. Repeat for appetize_developer.</em></p></figcaption></figure>

<figure><img src="/files/3FUzikEYW1zkttRHSdGD" alt=""><figcaption><p>Your app roles should look like this</p></figcaption></figure>

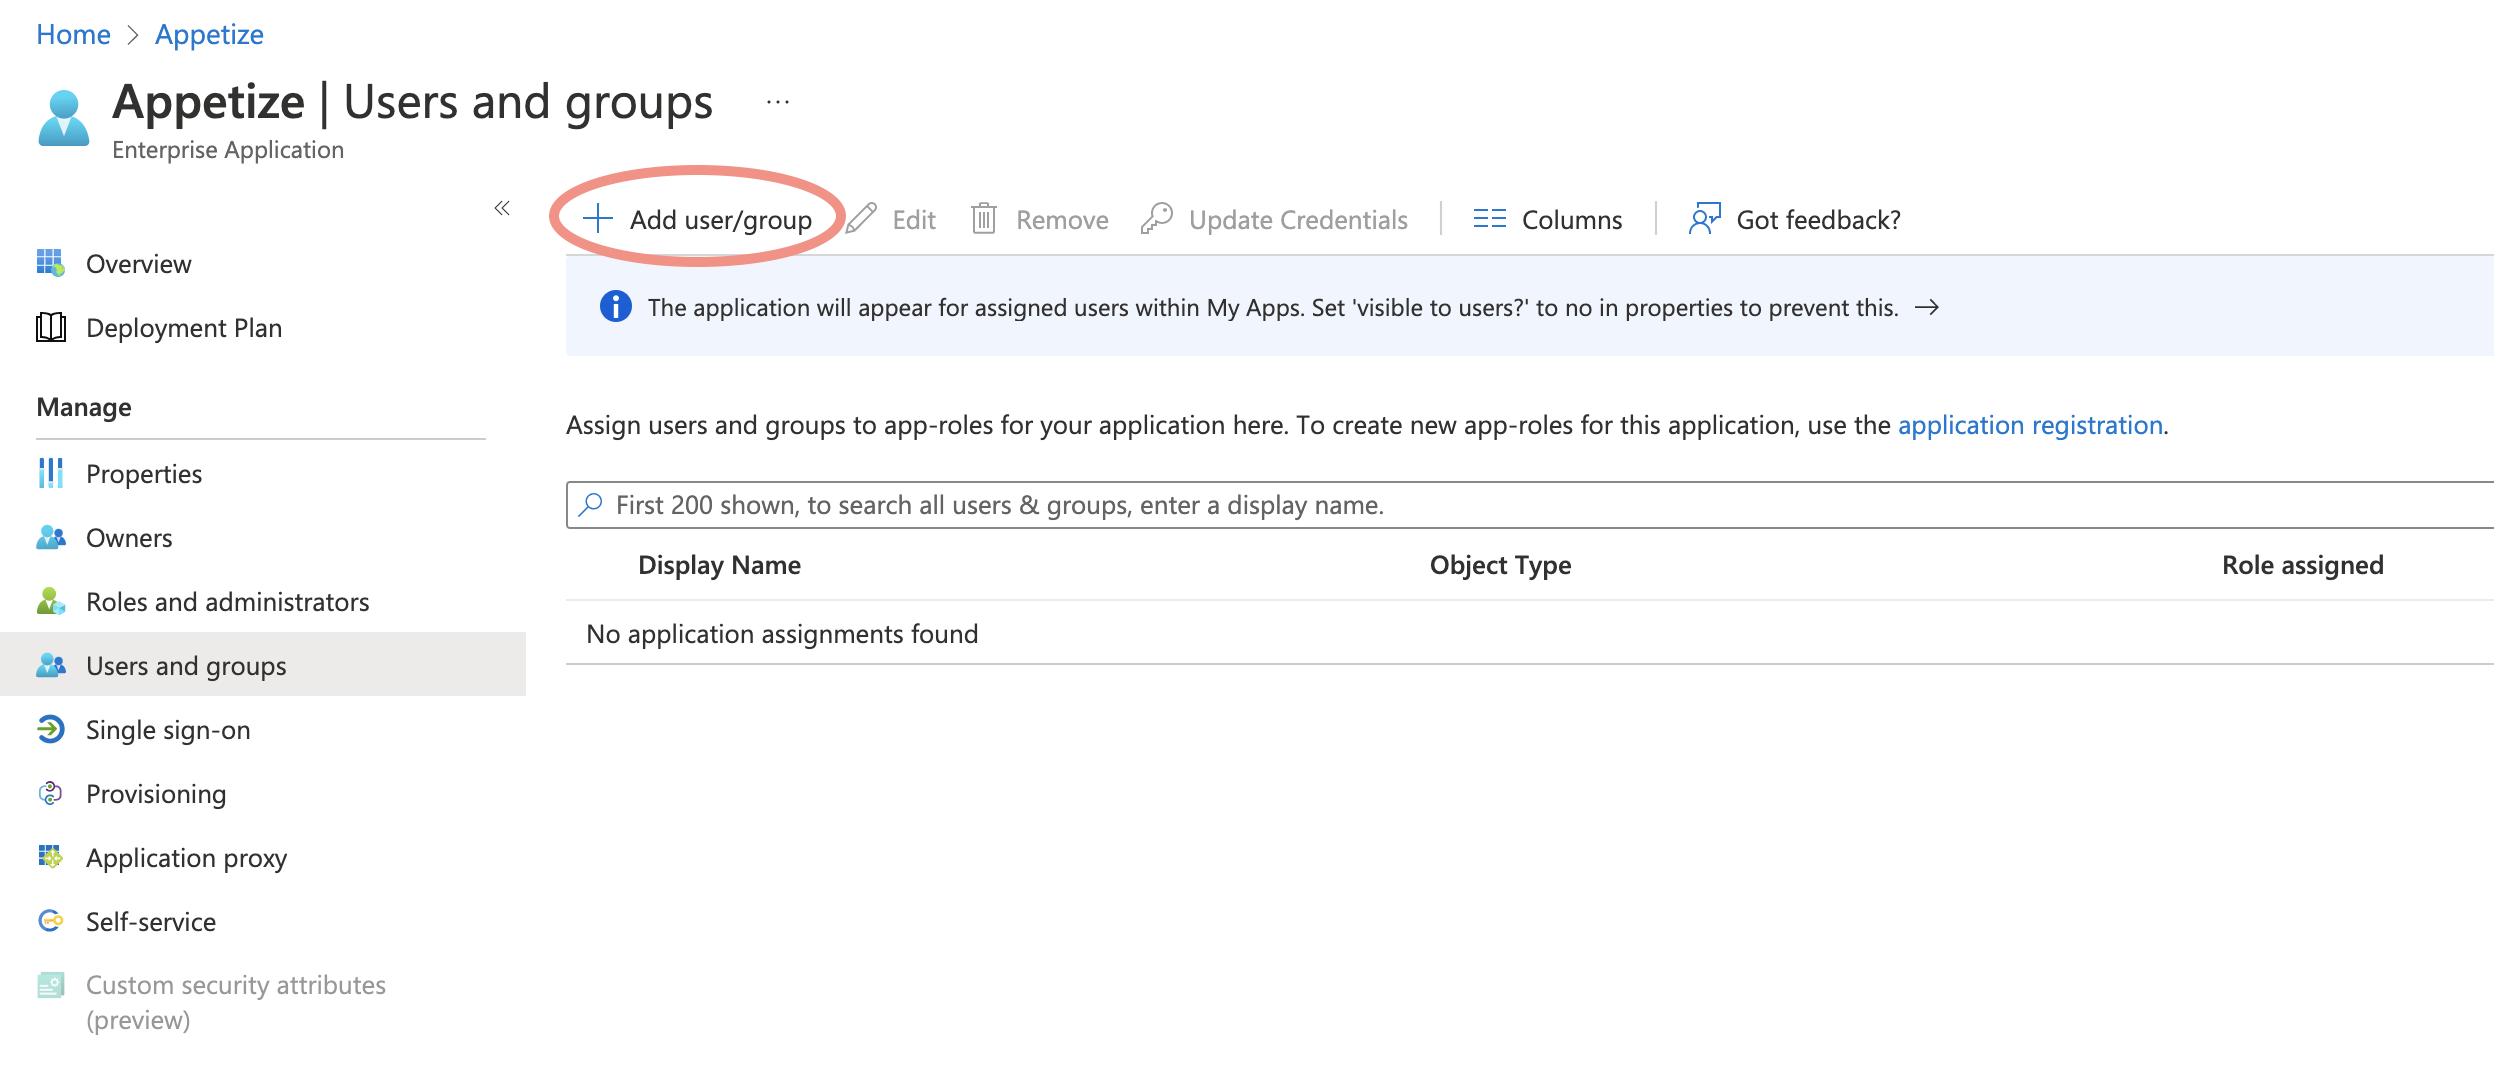
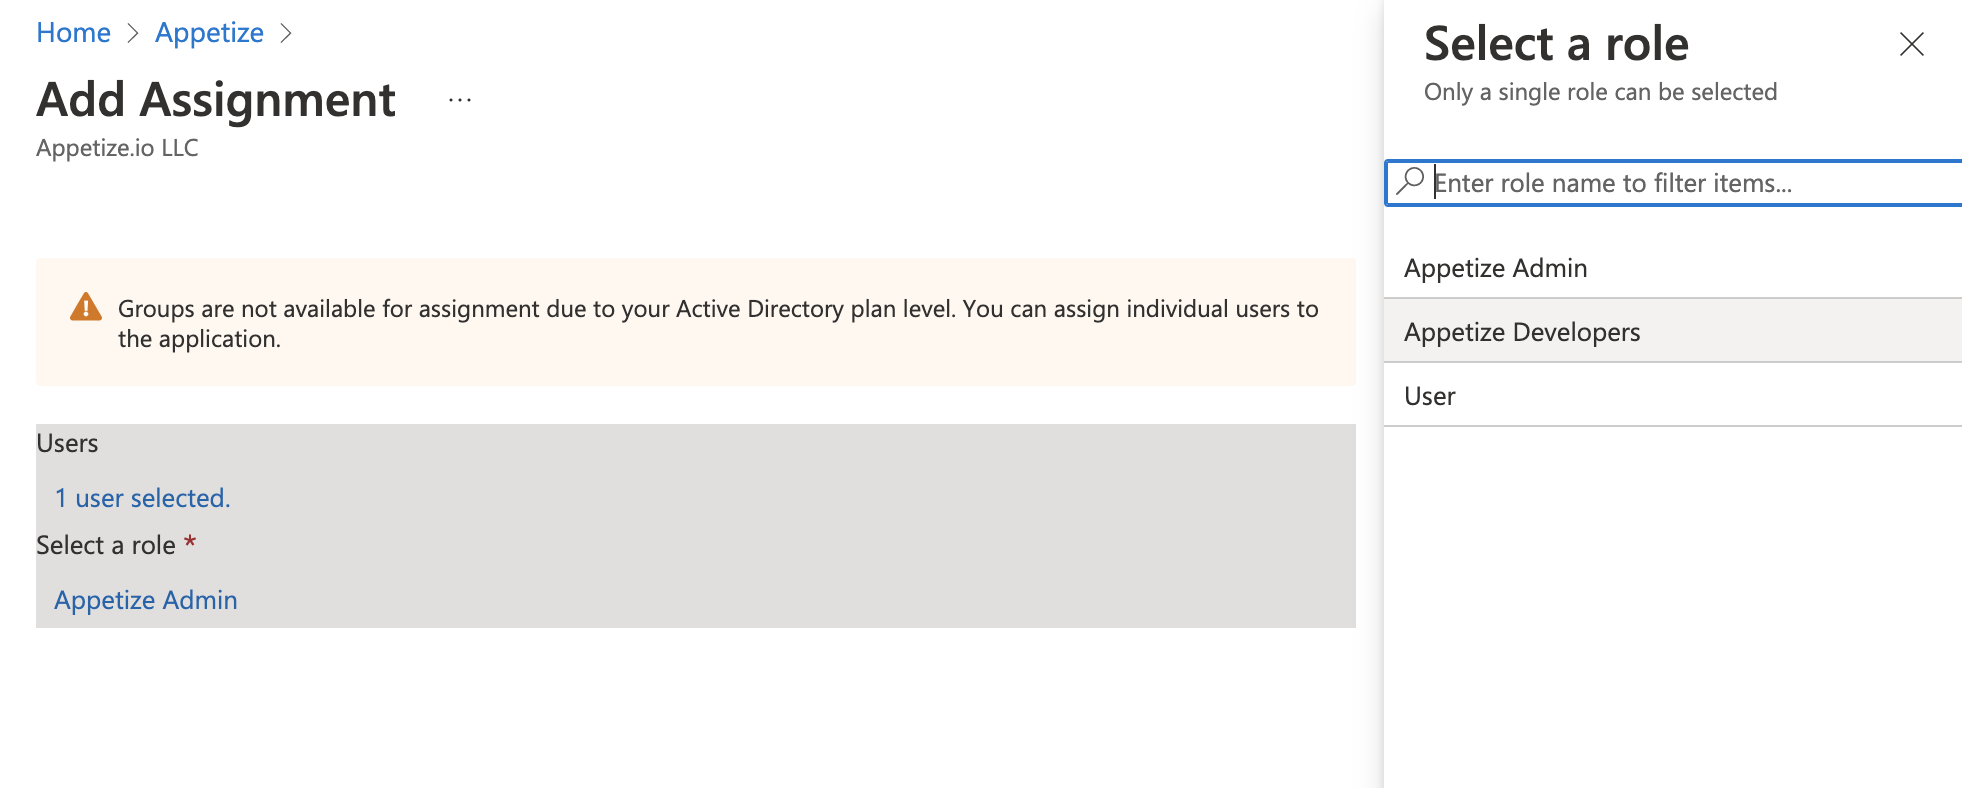
Return to "Enterprise Applications" and choose "Appetize". Click "Users and groups" to authorize logging in. Click "Add user/group" and choose from your organization's existing users or groups. Select a role (Appetize Admin, Developer, or User) as appropriate. Save the assignment.

<figure><img src="/files/vHBlHccPqEWyQ4NZrJHs" alt=""><figcaption><p>Go to Users and Groups for the Appetize application</p></figcaption></figure>

<figure><img src="/files/VSHlFtP2dXDs6C34rJXx" alt=""><figcaption><p>Choose users and/or groups and assign them to the Admin, Developer, or User role</p></figcaption></figure>

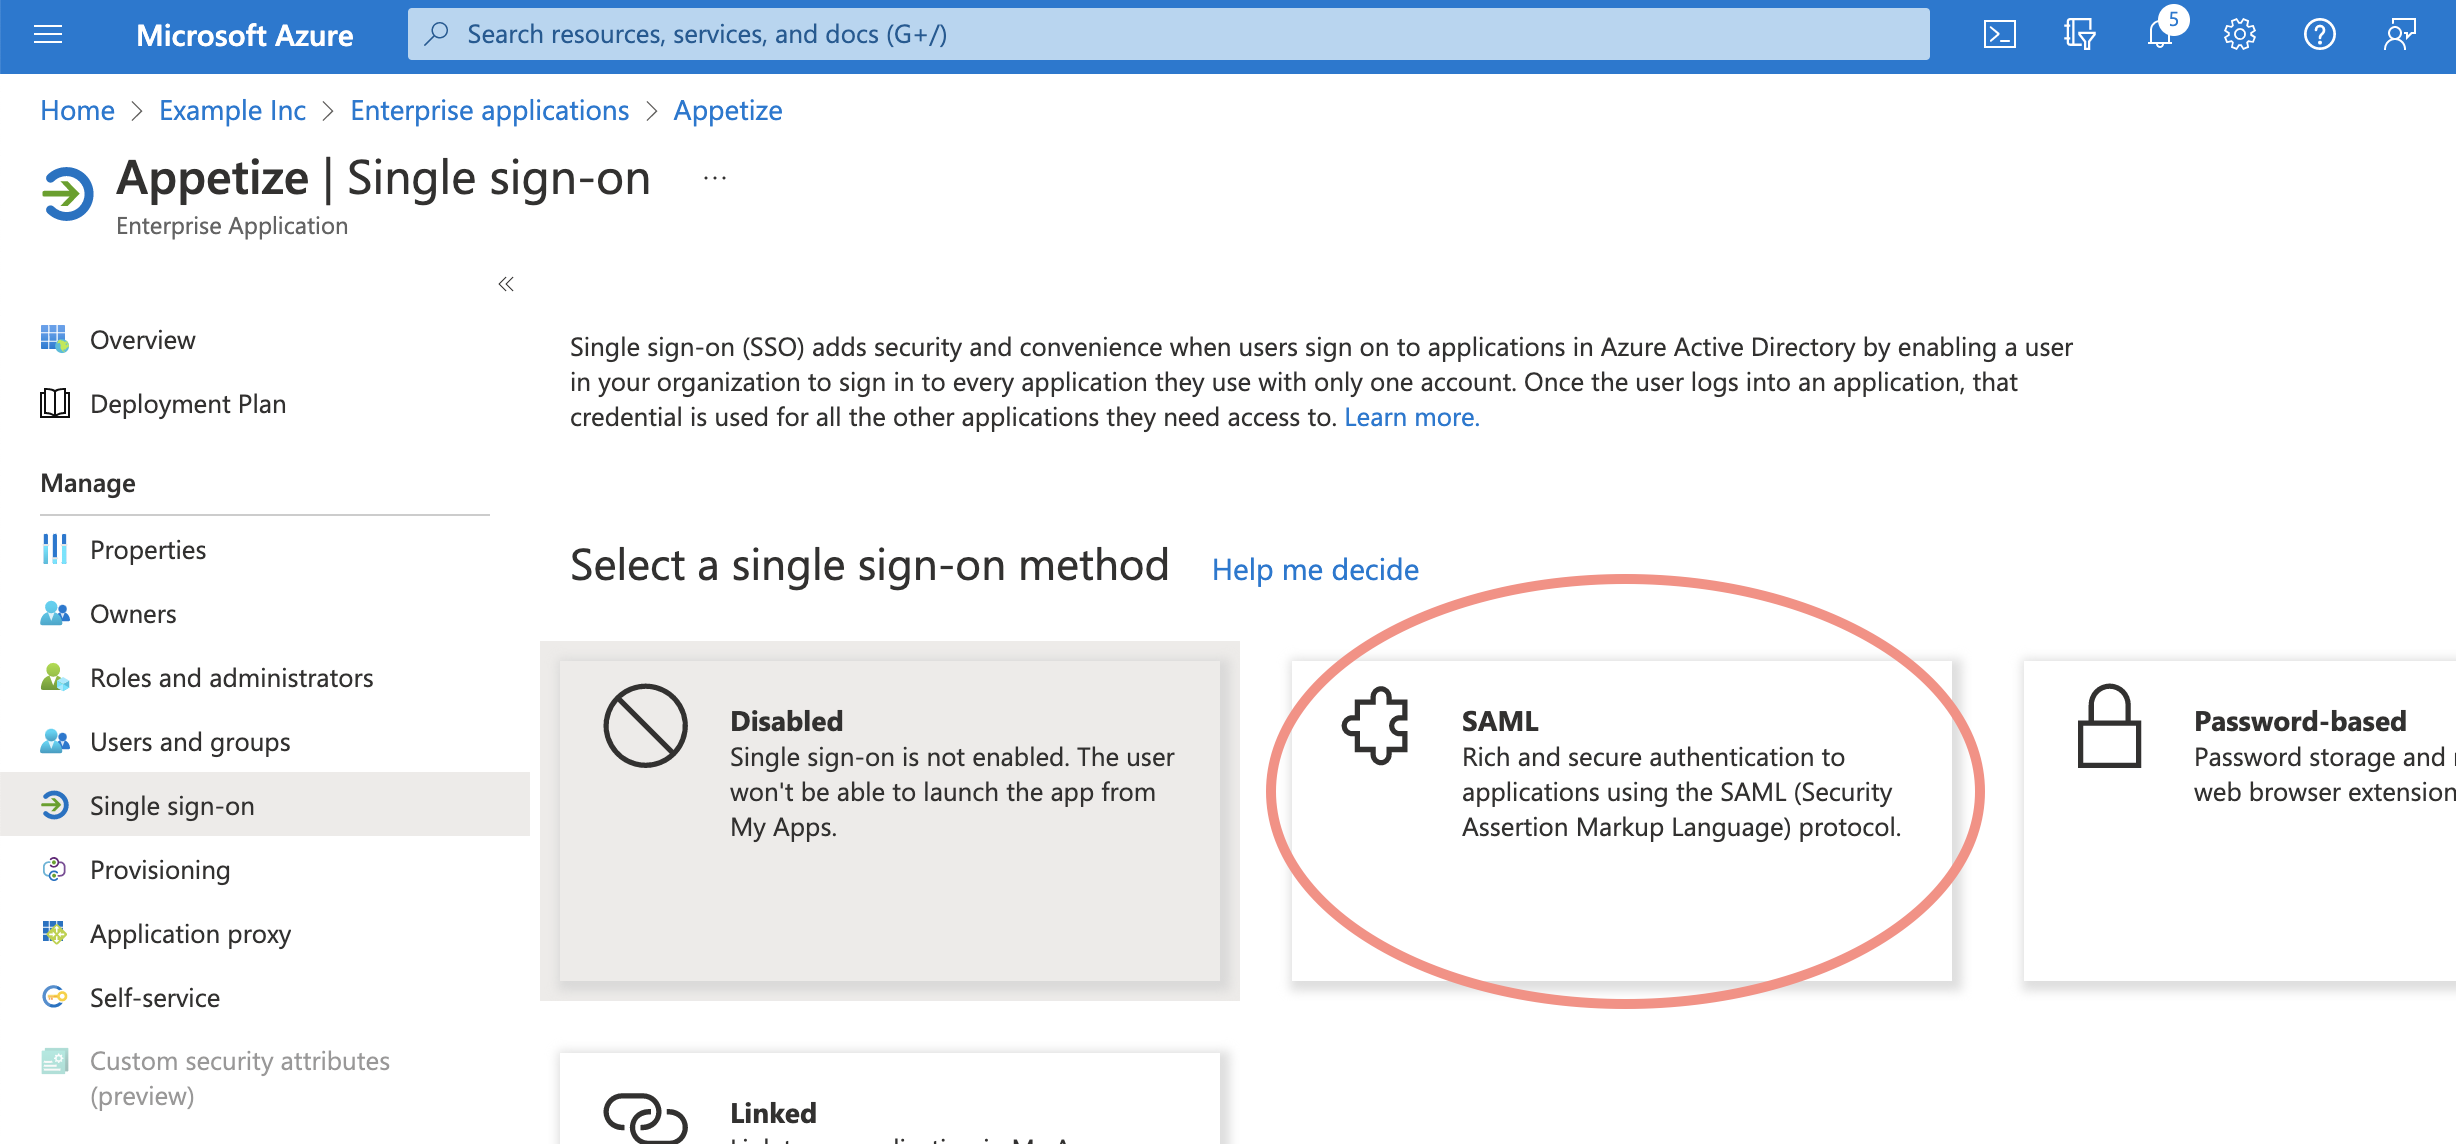
Click "Single sign-on" and click "SAML". Enter the entity ID and Assertion Consumer Service URL provided by Appetize support.

<figure><img src="/files/ywB0qfjAz4HGWbM8XkNd" alt=""><figcaption><p>Click SAML</p></figcaption></figure>

<figure><img src="/files/n01BcFmdU1bdwUxfoHqE" alt=""><figcaption><p>Enter values provided by Appetize support</p></figcaption></figure>

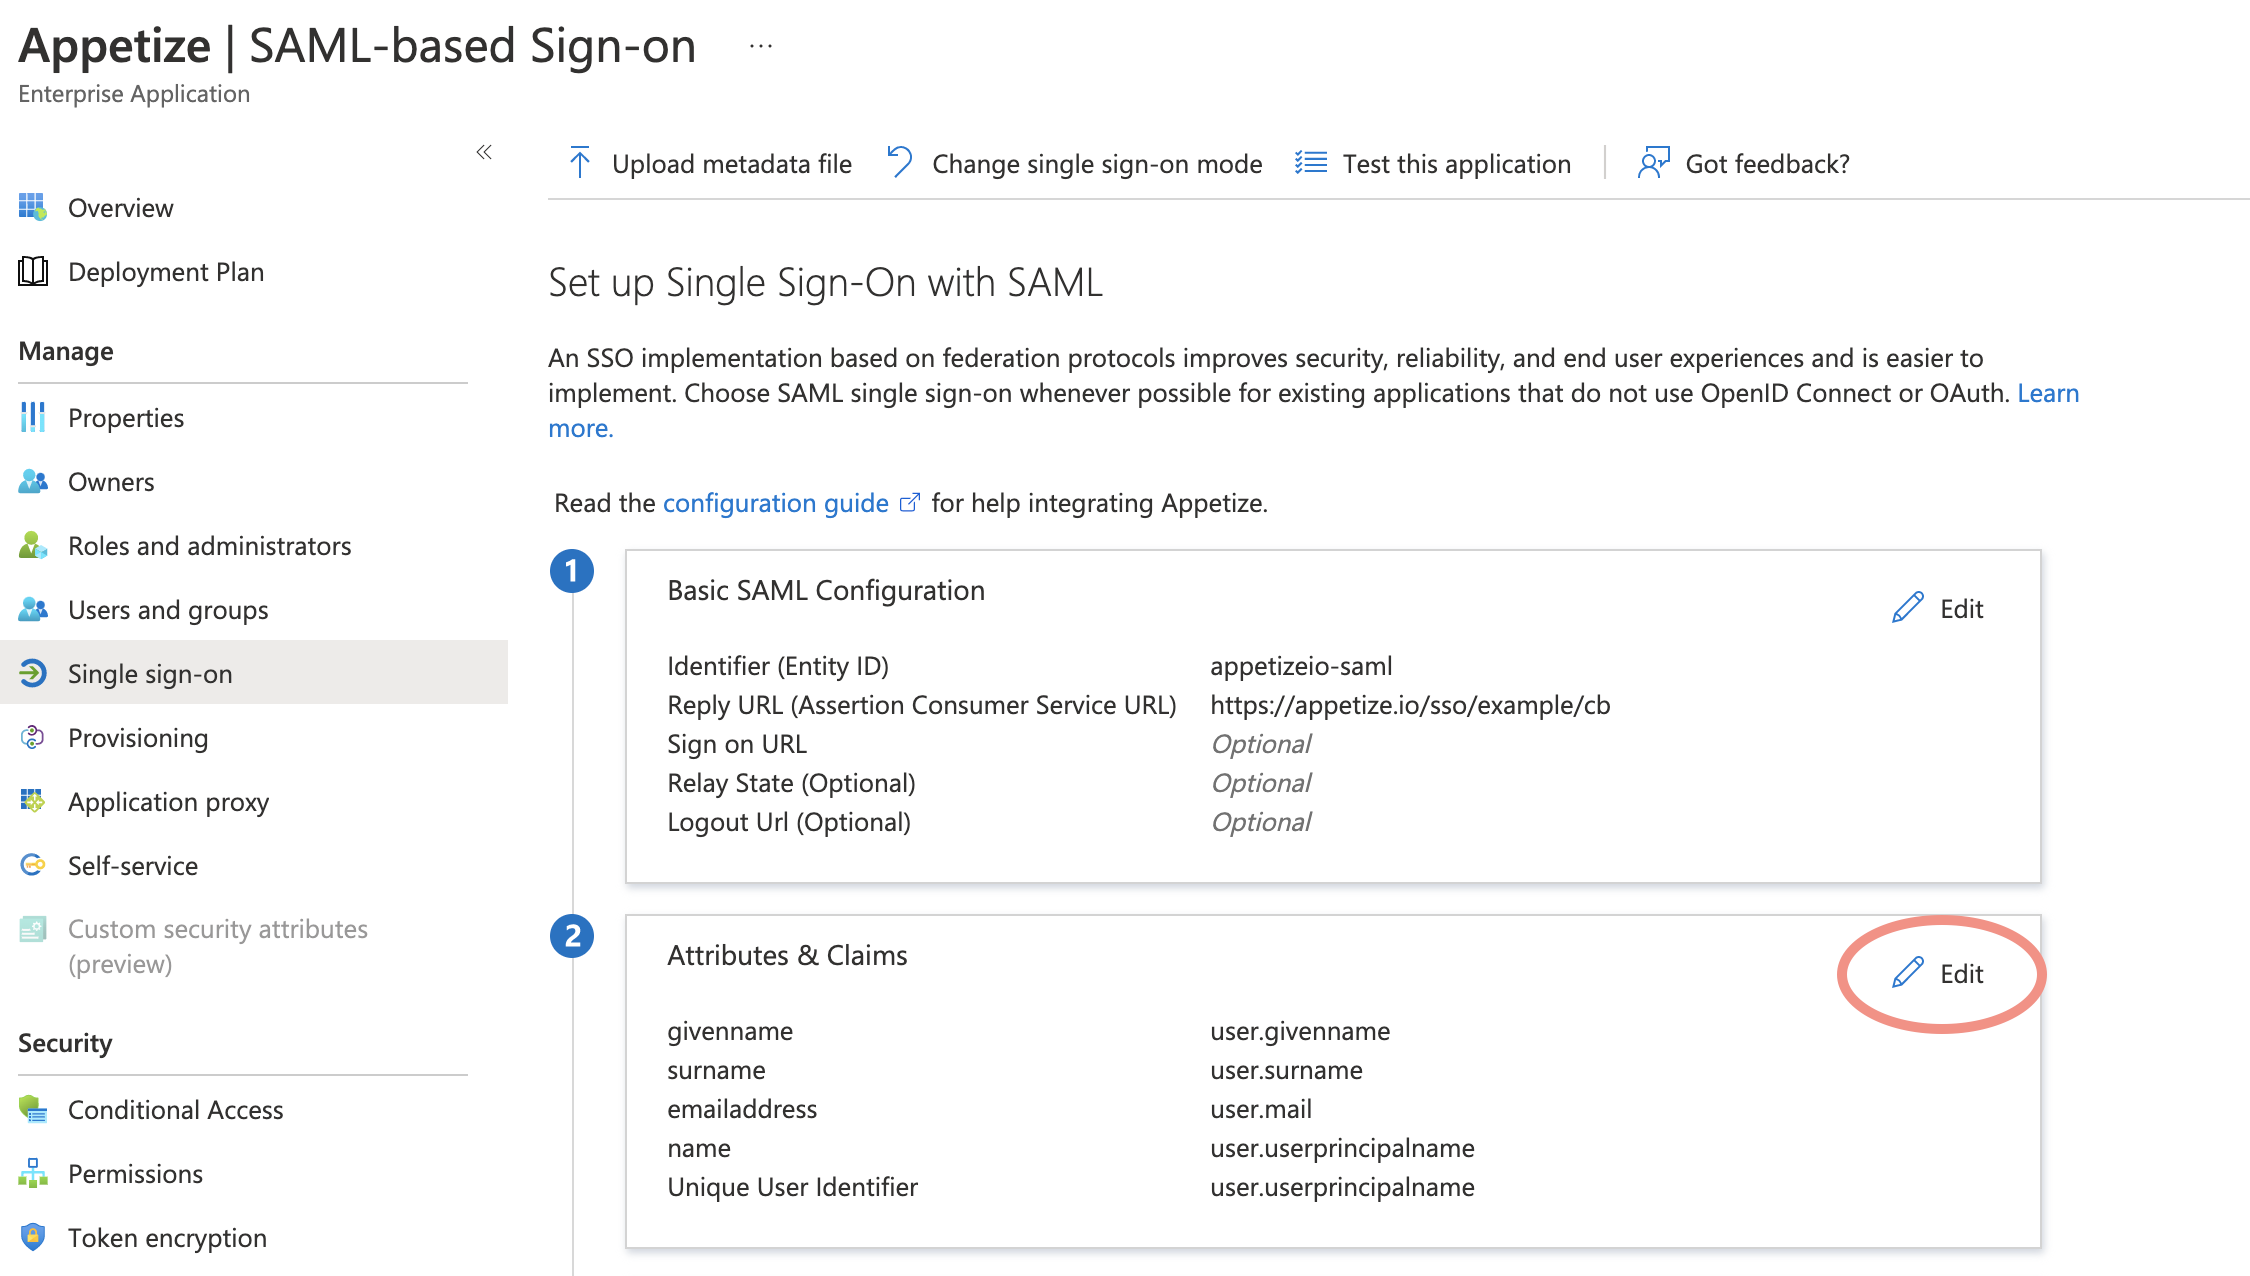
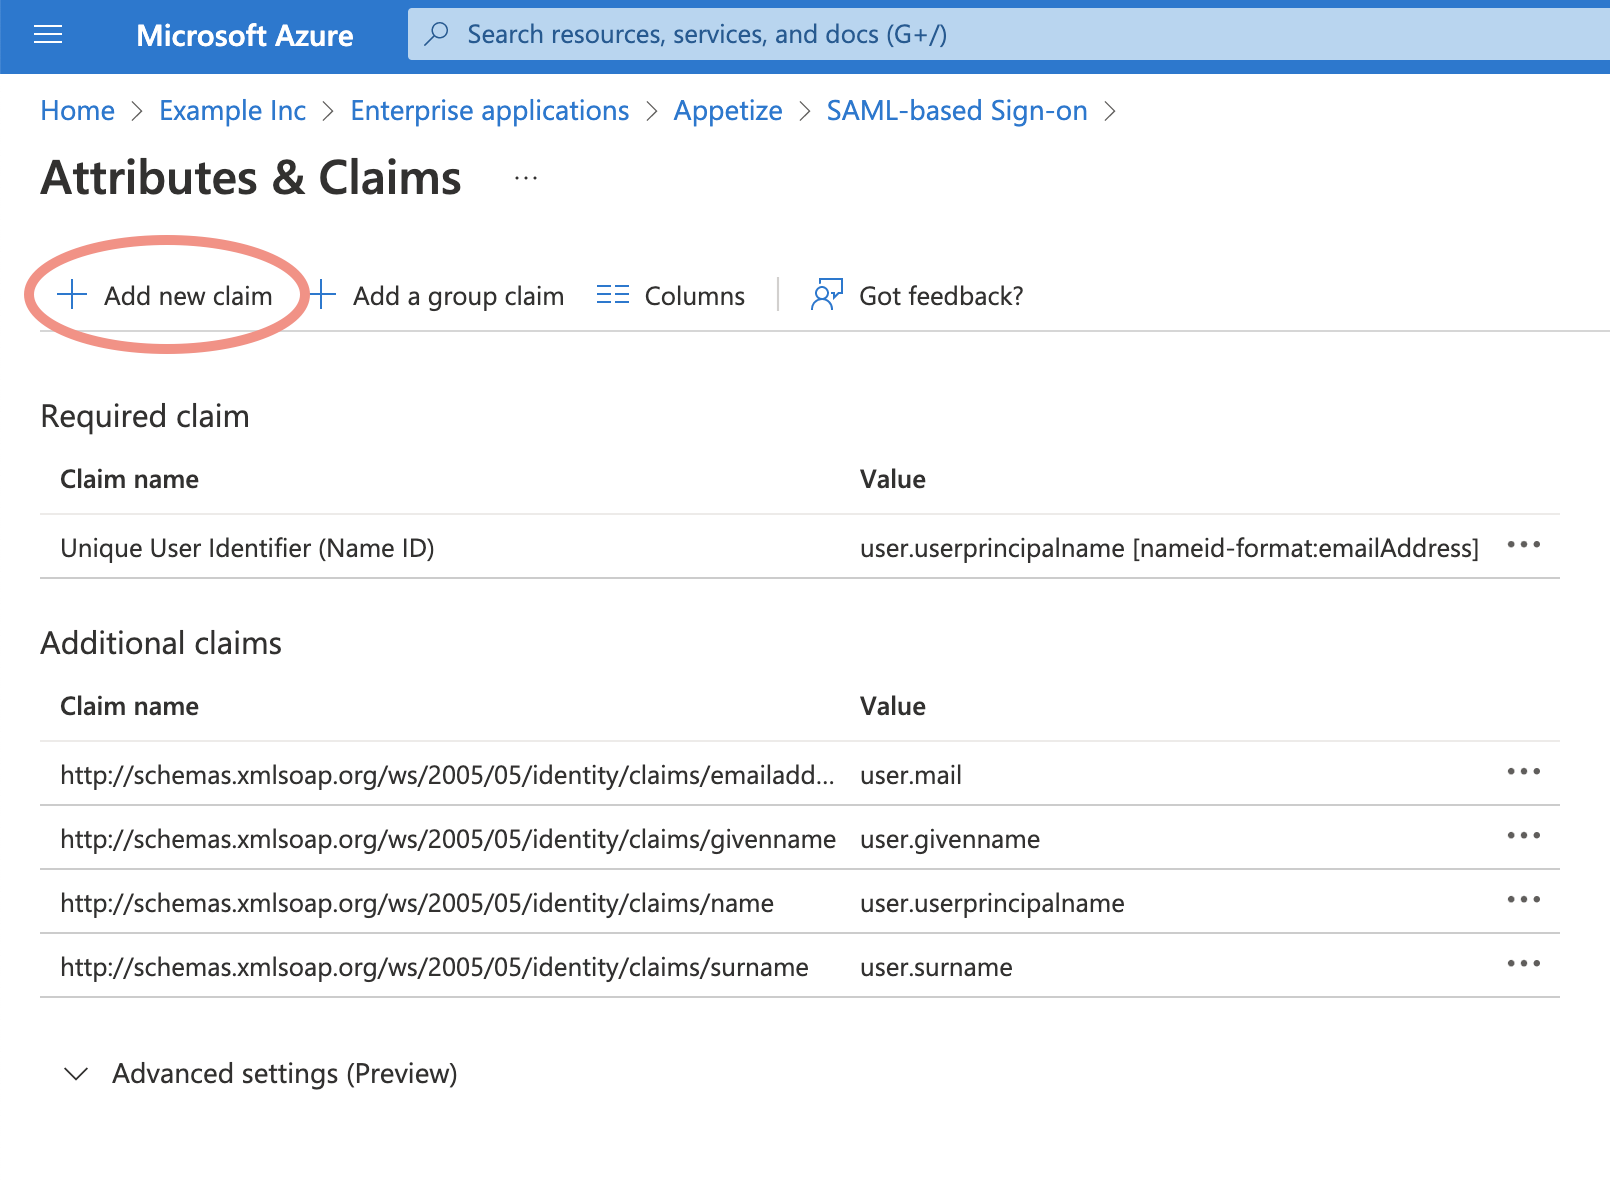
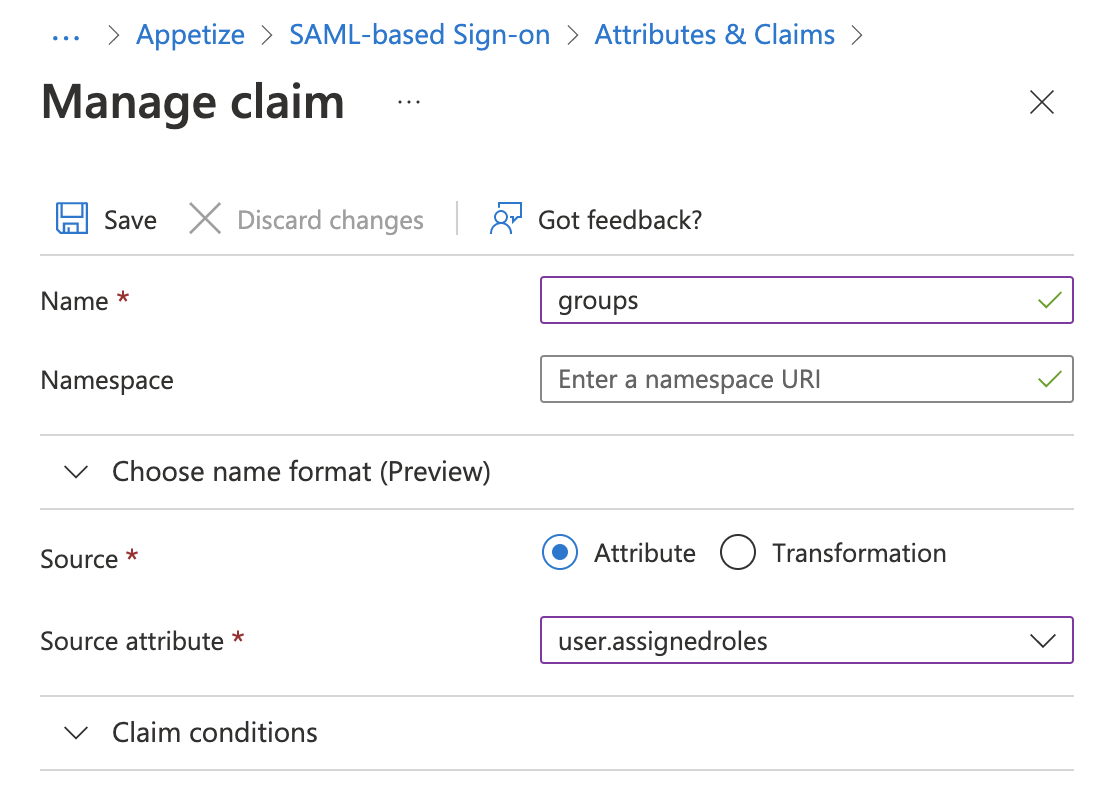
On the next page, click the edit button next to "Attributes & Claims". Click "Add a new claim". Name: groups, Source: attribute, Source attribute: user.assignedroles. Save the claim.

<figure><img src="/files/0EZXpdrR7AHinn9aSfot" alt=""><figcaption><p>Click Edit button next to Attributes &#x26; Claims</p></figcaption></figure>

<figure><img src="/files/KCra7Zs44NZZoMBksK5e" alt=""><figcaption><p>Click "Add new claim"</p></figcaption></figure>

<figure><img src="/files/EGp3paKWXgFsTMta2HSF" alt=""><figcaption><p>Name: groups. Source attribute: user.assignedroles</p></figcaption></figure>

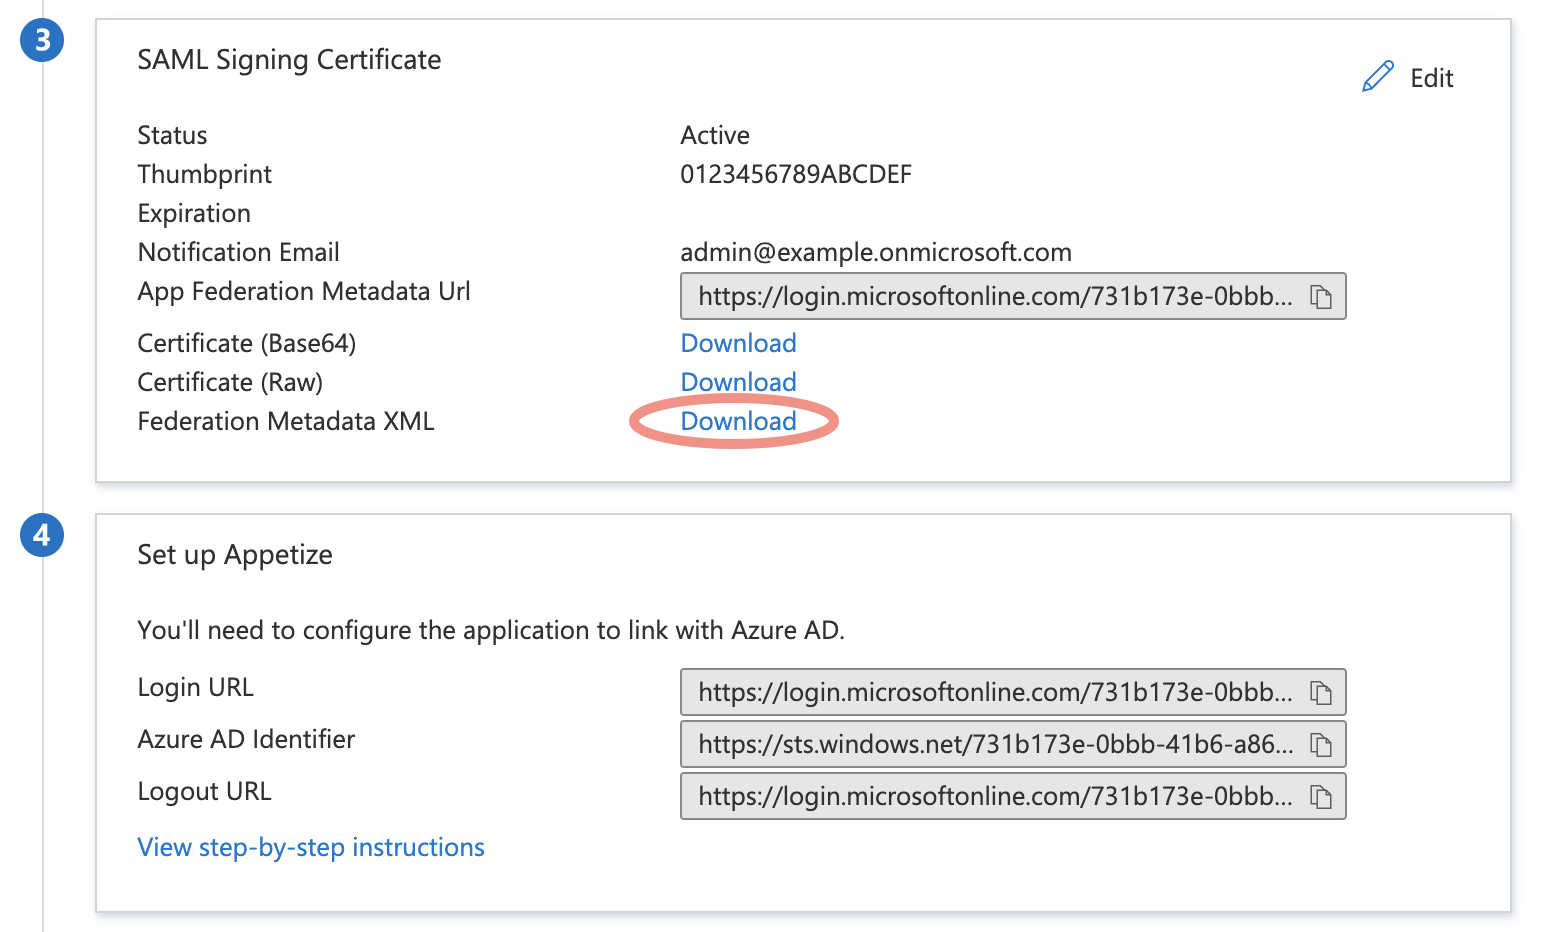
Return the SAML page and download the **"Federation Metadata XML" file**. Send this file to Appetize support. Alternative, you may send the **Certificate (Base64)** and the **Login URL**.

<figure><img src="/files/CjhTq1BCF3Tj5AyzCs1z" alt=""><figcaption><p>Download the Federation Metadata XML and send to Appetize support</p></figcaption></figure>

Appetize will provision SSO for your account after receiving the information. If necessary, we may also schedule a call to test the integration.